Menus
A menu is a named list of what you're selling on a particular day — a market stall, a weekend fair, the Saturday bake shed. You publish it, print the QR code, and anyone who scans it reads every item with its allergens.
A menu doesn't sell anything. It presents products you already have. Nothing you do to a menu changes a product, a price, or an order.
Why not just print a card?
A printed card is a snapshot. Change a recipe two weeks later and the card in your box is quietly wrong, and there is nothing to tell you.
A menu reads its allergen information from the approved label of each product. Change a recipe and BakeCheck knows the label no longer matches, so the menu tells you — on the menus list, on the menu itself, and by refusing to publish until it's sorted.
Before you start
Every product you want on a menu needs an approved, up-to-date label. That means you've been through Labels for it: generated a draft, reviewed it, approved it, and haven't changed the recipe since.
The picker shows you the state of each product as you choose, so you don't have to find out at the end.
Step 1 — Create the menu
Go to Menus → New Menu. Give it a name you'll recognise later — "Saturday Bake Shed", "Summer Fair 2026" — and optionally a date, a place, and a short intro.
The dates are shown on the page. They don't hide it: a menu stays readable after the event so someone who scanned at the stall can still check what they bought.
If you price on a chalkboard rather than on paper, untick Show prices.
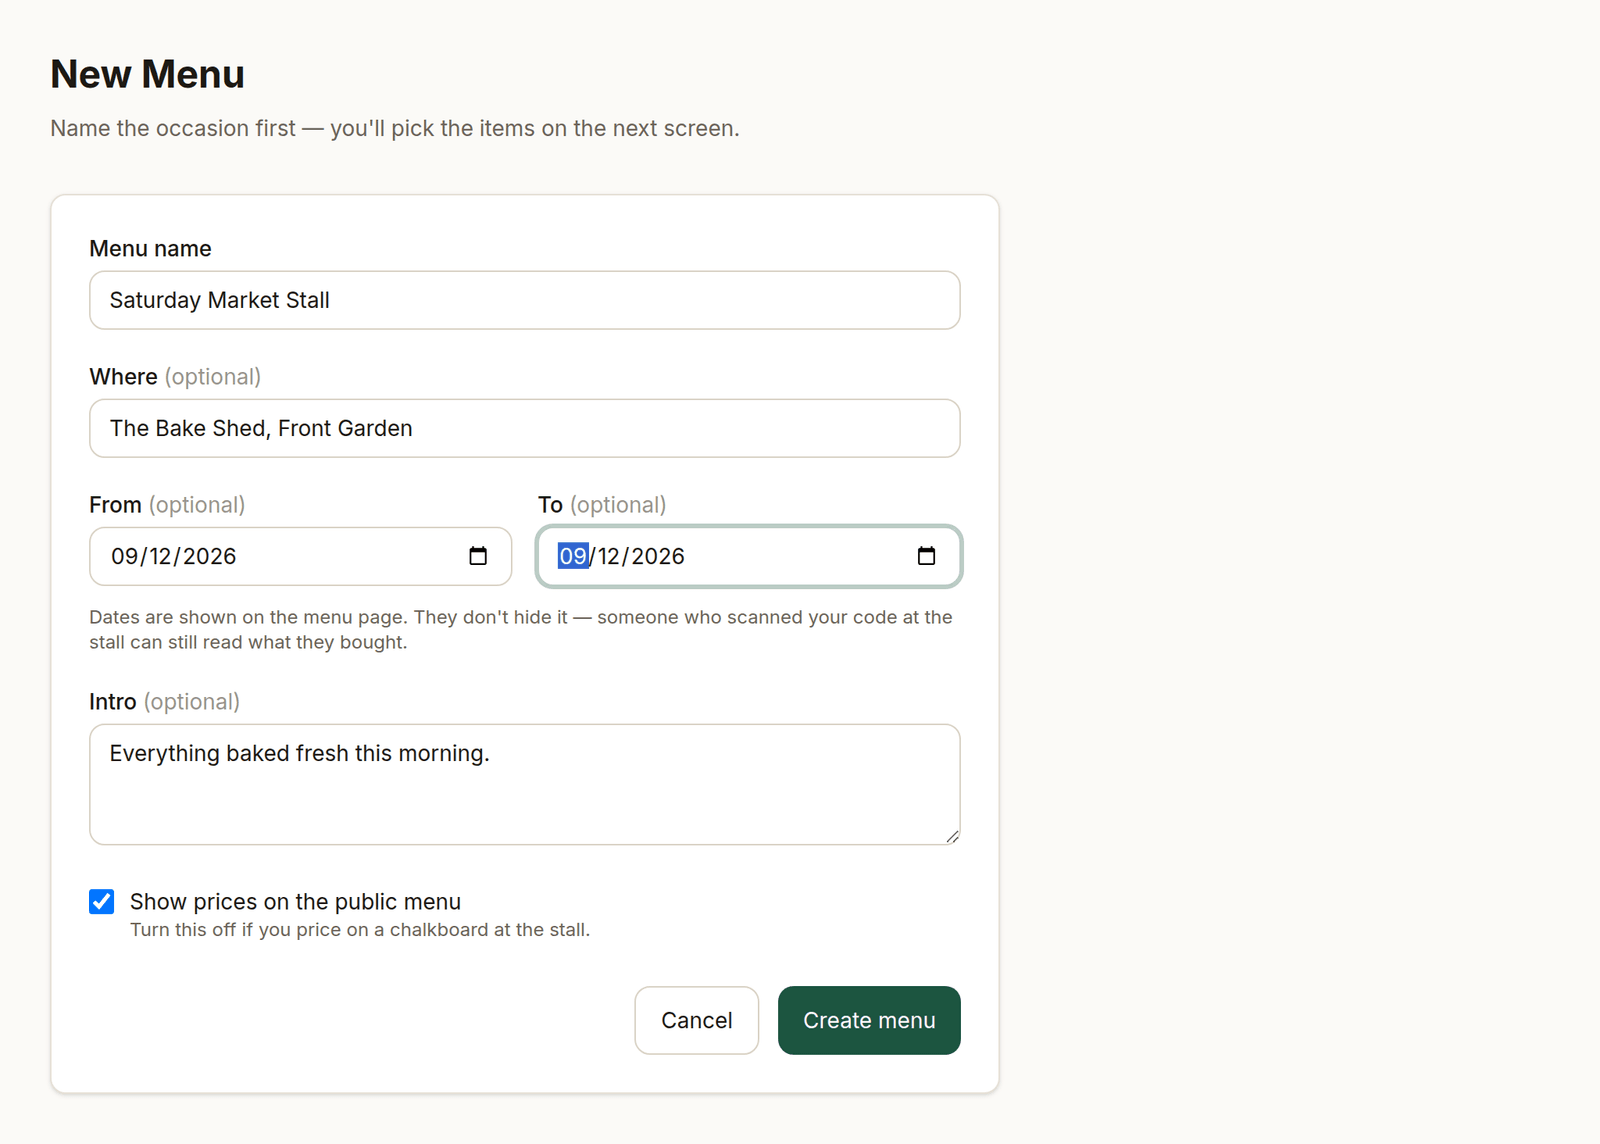
Creating a menu.
Step 2 — Build the line-up
Add products from the picker — on the right on a computer, above the line-up on a phone. For each line you can set:
- Section — a heading to group under, like "Traybakes" or "Bread". Type the same section on several items and they appear together, in the order you put them. Leave it blank and the item sits in an unheaded group at the top.
- Price for this menu — an occasion price that differs from your standard one. Leave it blank to use the product's own price.
- Note — a short line under the item, like "last two".
- Sold out — crosses the item through rather than removing it, so the allergen record for the day stays complete.
Reorder with the arrows. Nothing is saved until you press Save.
On a phone the section, price and note fields fold away behind a toggle on each line, so a long line-up stays readable; anything you've set is shown underneath the item name.
From the other direction
You can also start at the product. On Products, the Menus button on a product opens a list of your menus with tick boxes — tick every menu that product belongs on and save. A product can be on as many menus as you like.
To add several at once, tick the products on the list and use Add to menus in the bar at the top. That one only adds — nothing already on a menu is taken off — and it tells you afterwards what it left off and why.
A menu that's already live won't accept a product without an up-to-date approved label: it's shown greyed out with the reason, because a published menu is an allergen statement and can't quietly gain an item that has none. Draft menus take anything.
Step 3 — Publish
Publish makes the menu readable to anyone with the link.
If any item doesn't have an up-to-date approved label, publishing is blocked and the page lists exactly which items and why. Approve those labels on their product pages, come back, and save again.
This is deliberate. A published menu is a public allergen statement, and it should not be possible to make one out of items whose declarations you haven't signed off.
Step 4 — Share the QR code
Once published, the menu page shows a QR code and a link. Download PNG gives you an image to drop into a stall card, a poster, or a table tent.
The link keeps working after the event. Don't delete a menu whose QR code you've printed — the code will stop working.
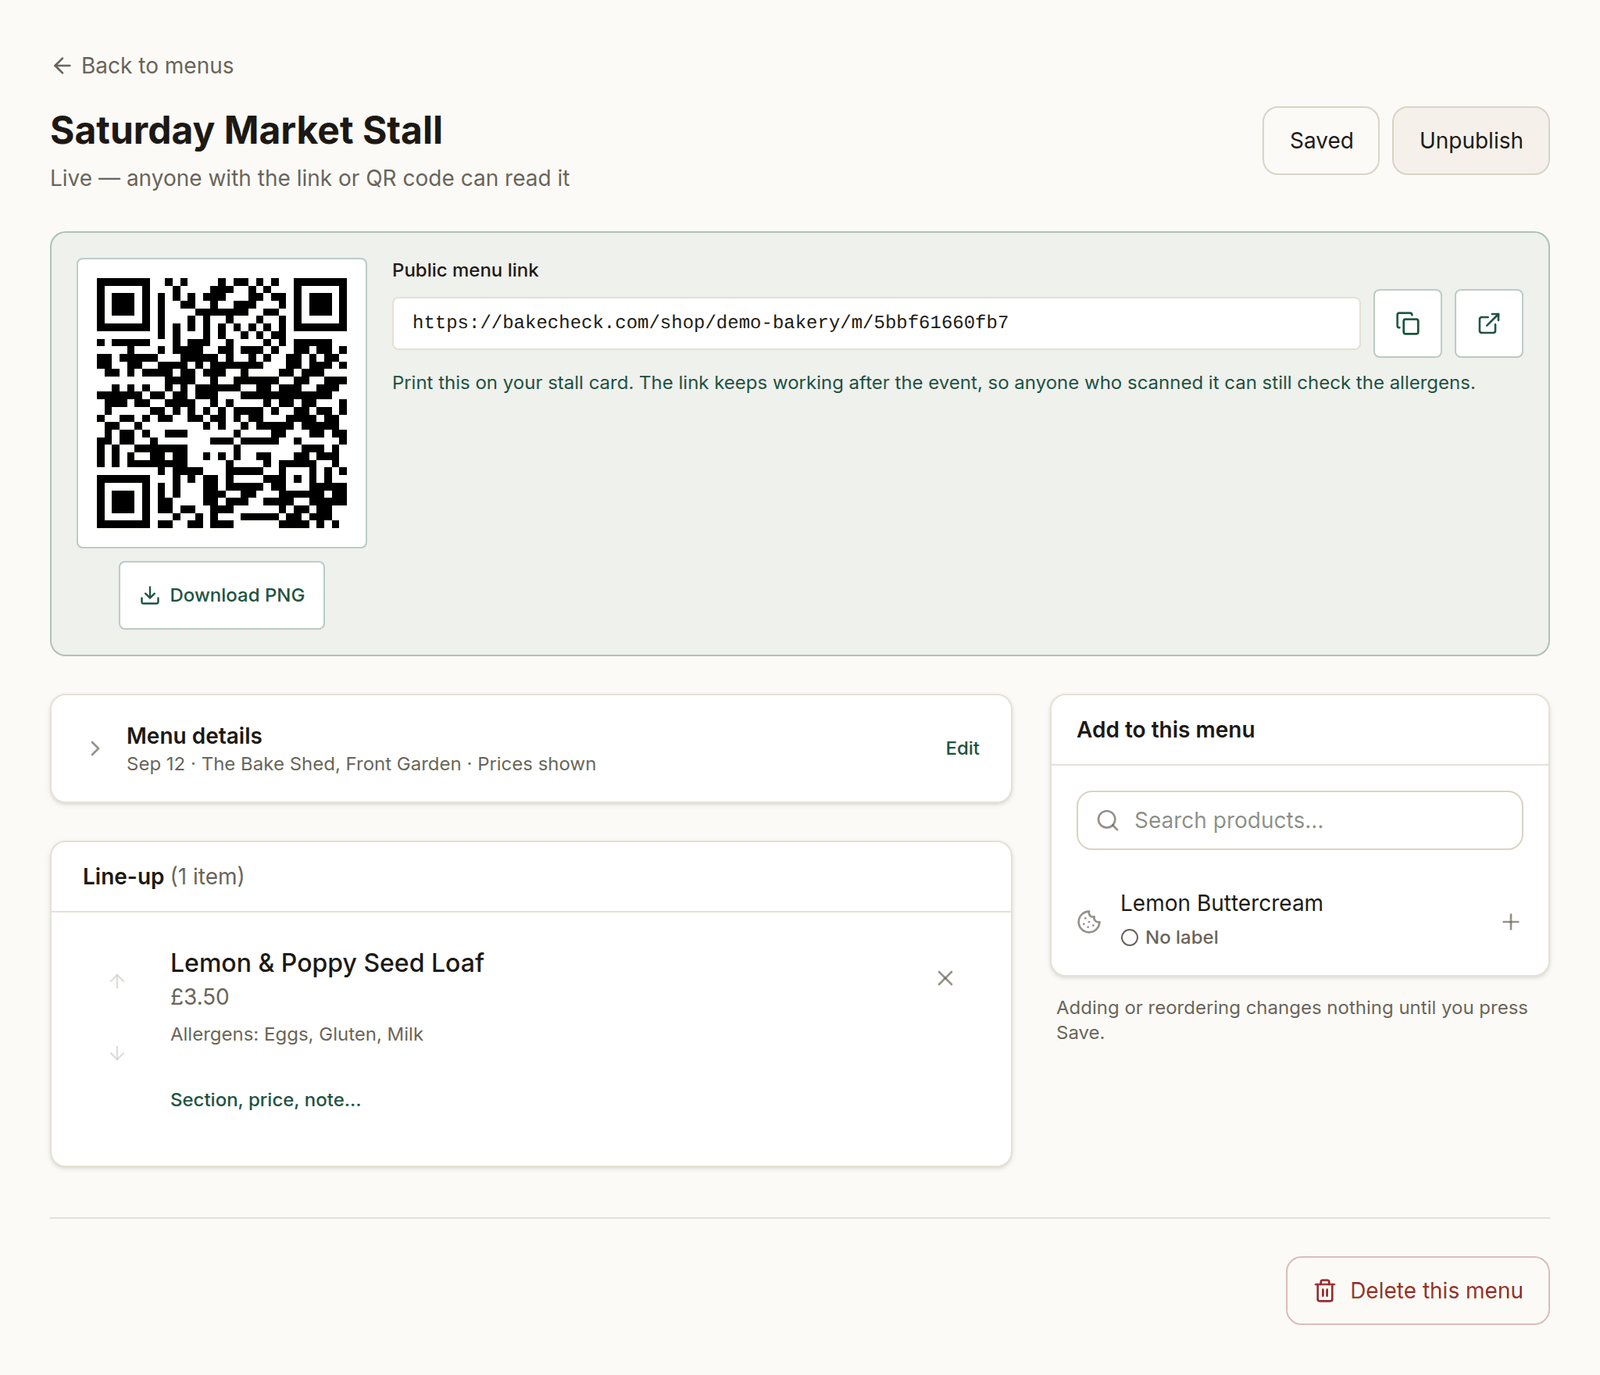
A published menu. The public link is shown at the top; the line-up carries each item's allergens through from its approved label.
When a recipe changes
If you edit a recipe behind an item on a live menu, the menu is flagged in red on the menus list and at the top of the menu itself.
The public page keeps showing the label you approved, because that's the declaration a person signed off. But it may no longer describe what's in the tin, so treat the warning as urgent: regenerate and approve the label, then save the menu again.
What customers see
A plain page with your bakery name, the menu name and date, and every item with:
- its price (unless you've turned prices off),
- its allergens as a row of tags,
- Full ingredients, which expands to the approved label text.
There's no cart and no checkout — a menu works whether or not you have the online store turned on. If you do run a store, the storefront's own menu page is a separate thing: it lists everything you sell all the time, whereas a menu here is one occasion.
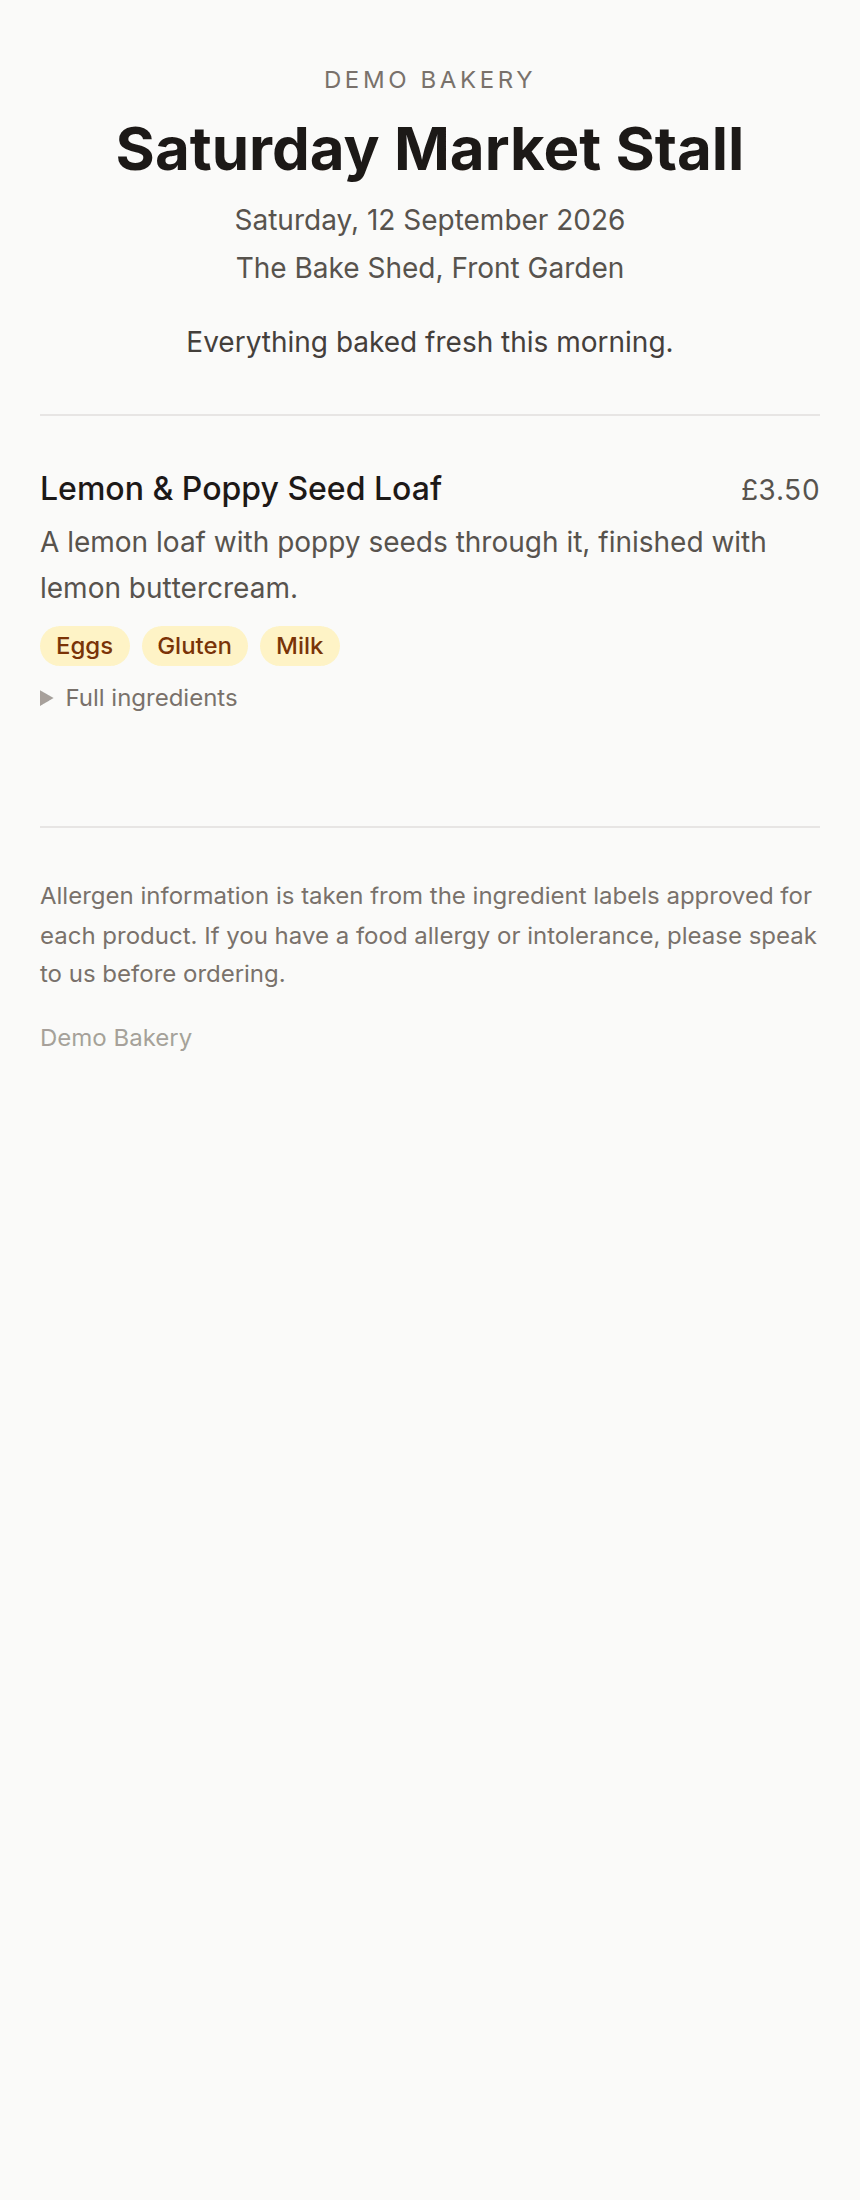
The page a customer reaches from the QR code.
Deleting a menu
Deleting removes the menu and its line-up. Your products aren't touched. Any QR code printed for that menu stops working, so if the event is over and the code is in the recycling, delete away — otherwise consider Unpublish instead, which takes the page down but keeps the link reserved.