Labels
A label is an ingredient declaration generated from a product's recipe, in the format UK food labelling uses: ingredients in descending order of weight, with allergens emphasised in CAPITALS. Labels are versioned and go through a review-and-approve gate before they can be printed, so what you print is always something you've signed off.
What BakeCheck decides, and what you decide
BakeCheck writes the draft and runs a deterministic allergen check over it. It does not tell you that a label is legally compliant, and it can't — it has no way to know whether the data you entered matches the packet in your hand, or whether anything else on your packaging is required.
What you get is a draft and a check. You review it, you approve it, and it stays your call. That's why approval is a deliberate step with a disclaimer attached and your name recorded against it.
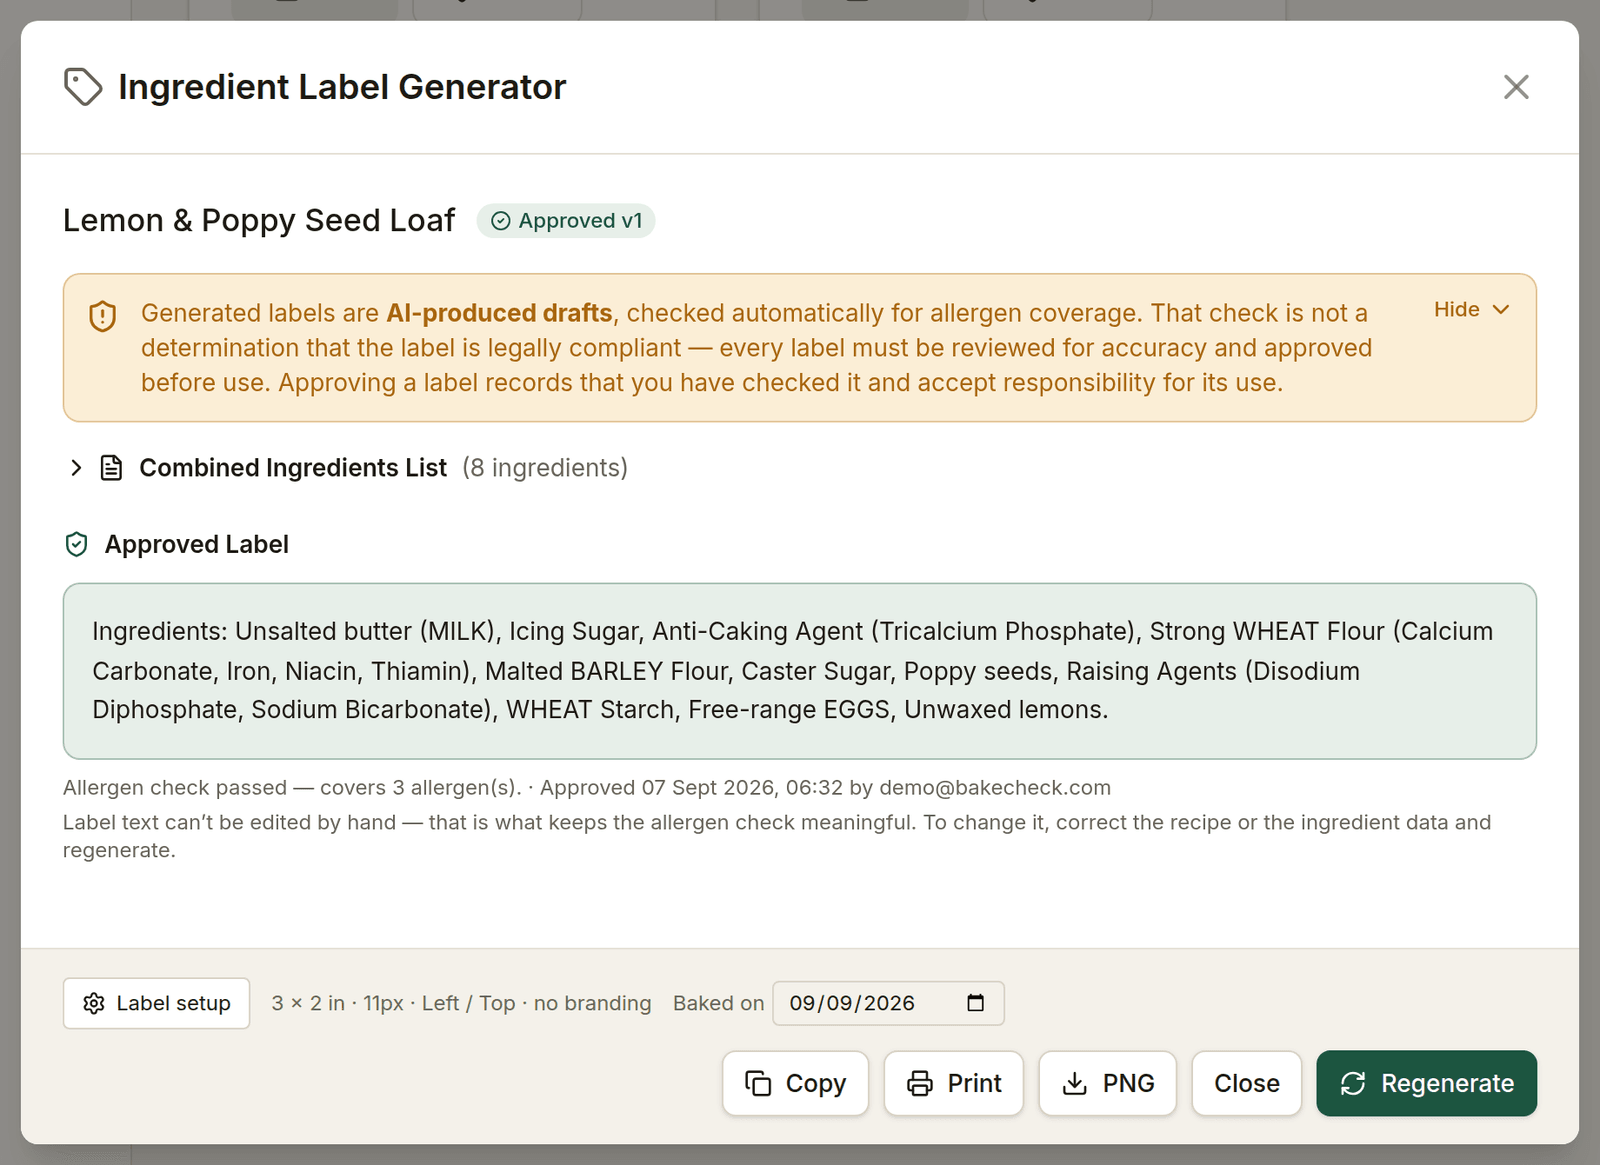
An approved label. The line underneath records the allergen check, and who approved it and when.
Before you start
The product must have at least one ingredient, and every ingredient in it — including ingredients reached through a component product — must have its composition and allergens filled in.
If any are missing, Generate is disabled and the label window lists exactly
which ingredients to fix. A blank allergens field counts as missing: it is not a
declaration that the ingredient is allergen-free. Where an ingredient genuinely
contains none of the 14, enter None to say so. See
Ingredients and Allergens.
You should also fill in your business address before you print anything. A label on pre-packed food sold in Great Britain has to name the business responsible for the food and give a physical address for it — a website or an email address is not enough. BakeCheck prints it from Settings → Business identity and Settings → Location & contact, and warns you on the label screen while it is blank.
Step 1 — Generate a draft
Open a product and click Label, then Generate. The app:
- flattens the recipe (including any component products) and rolls up all allergens,
- sorts ingredients by descending weight,
- writes the declaration and emphasises allergens in CAPITALS,
- runs an automatic allergen coverage check.
The result is saved as a draft.
Step 2 — Review the allergen check
- Passed — every allergen from your ingredients appears, correctly emphasised, in the label text. You can proceed.
- Failed — one or more allergens are present in the ingredients but not emphasised in the label. The check tells you exactly which. Fix the ingredient allergen data (or regenerate), then generate again. A failed label cannot be approved.
A passing check means the label covers the allergens your ingredient data says are there. It cannot tell you that data was right in the first place — that part is the review you do next.
The label text isn't editable
There is no way to type into a generated label, and that's deliberate.
The allergen check works by comparing the label text against the allergens rolled up from your ingredients. If the text could be edited afterwards, the check would be describing something other than the label you actually print, and approving a label would stop meaning anything. Keeping the text generated is what makes the check impossible to talk your way past.
To change what a label says, change what it's generated from — the recipe, the quantities, or the ingredients' composition and allergens — and generate again.
Step 3 — Approve
Approving is a deliberate sign-off:
- Tick the liability disclaimer for this label.
- The first time you approve any label, you'll also accept the account-level terms once.
- Click Approve.
The label becomes your product's active label and is cached for fast printing and storefront display.
Step 4 — Print, copy, or export
Once approved you can print, copy to clipboard, or download a high-resolution PNG. Every print and export is recorded for your audit trail.
Label setup
Label setup opens the print options, with a live preview of the sticker:
- Size — the width, height and font size of your labels, in inches and pixels. If the declaration will not fit, the font shrinks automatically until it does.
- Alignment — how the text sits on the sticker: left, centre or right, and top, middle or bottom.
- Business details — the name and address printed on every label, shown here so you can check it. It comes from your settings rather than from this dialog, so one bakery cannot end up with two different addresses on its stickers; change it in Settings → Location & contact.
- Branding — an optional footnote in the bottom-left or bottom-right corner, in a smaller font. It starts as your bakery's name and you can change it to anything you like, or switch it off for a run of plain labels. It sits alongside the business details, it does not replace them.
These settings are remembered on this device and apply to every label you print from it. Baked on sits next to the button because it changes batch to batch.
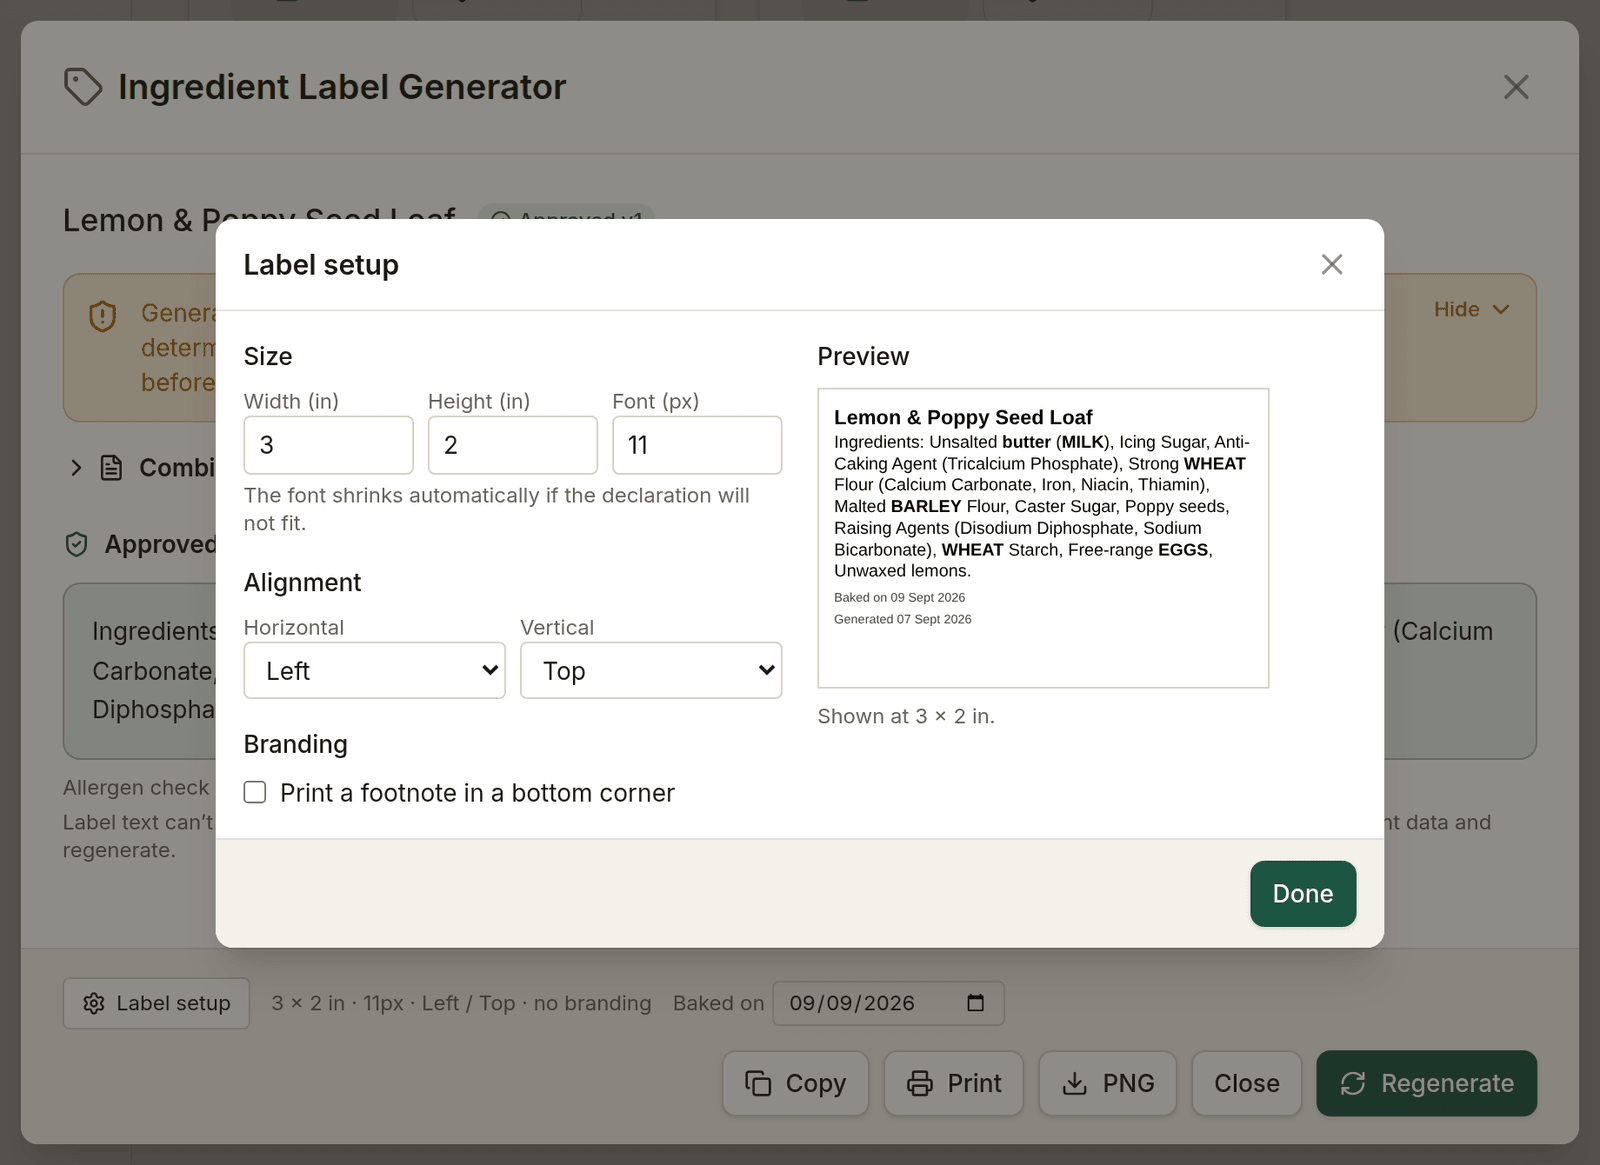
Label setup, with a live preview at the size you'll print.
Downloading several labels at once
On the Products page, tick the products you want and choose Download labels. You get a single zip with one PNG per product, using the same label setup and Baked on date as a single download.
Only products with an approved, up-to-date label go into the zip. The rest are listed with the reason, because the fix is different in each case:
- Missing ingredient data — an ingredient has no composition or no allergen declaration. Fill it in on the Ingredients page; no label can be produced until you do.
- Needs a new draft — no label yet, or the recipe has changed since the last one. You can generate drafts for all of these in one go from the same screen. A draft cannot be printed or shown in your shop, so this is safe to run.
- Waiting for your approval — a draft is ready and has passed the allergen check. Approving is always one label at a time. Approving records that you read that specific declaration and accept responsibility for it, so there is deliberately no way to approve a batch in one click.
If a recipe changes while the download screen is open, that label is left out of the zip and named on screen — do not use any copy of it.
When a label goes "out of date"
If you later change the product's recipe (add, remove, or re-quantify an ingredient), or change the composition or allergens of any ingredient in it, the approved label no longer matches. The product shows Label out of date. Simply generate a new label and approve it again — the previous version is kept in the history.
Label status badges
- No label — nothing generated yet.
- Label needs approval — a draft exists but isn't approved.
- Allergen check failed — regenerate after fixing ingredient allergens.
- Label out of date — the recipe changed; regenerate and re-approve.
- (no badge) — approved and current. You're good to print.
Stuck? See troubleshooting.